
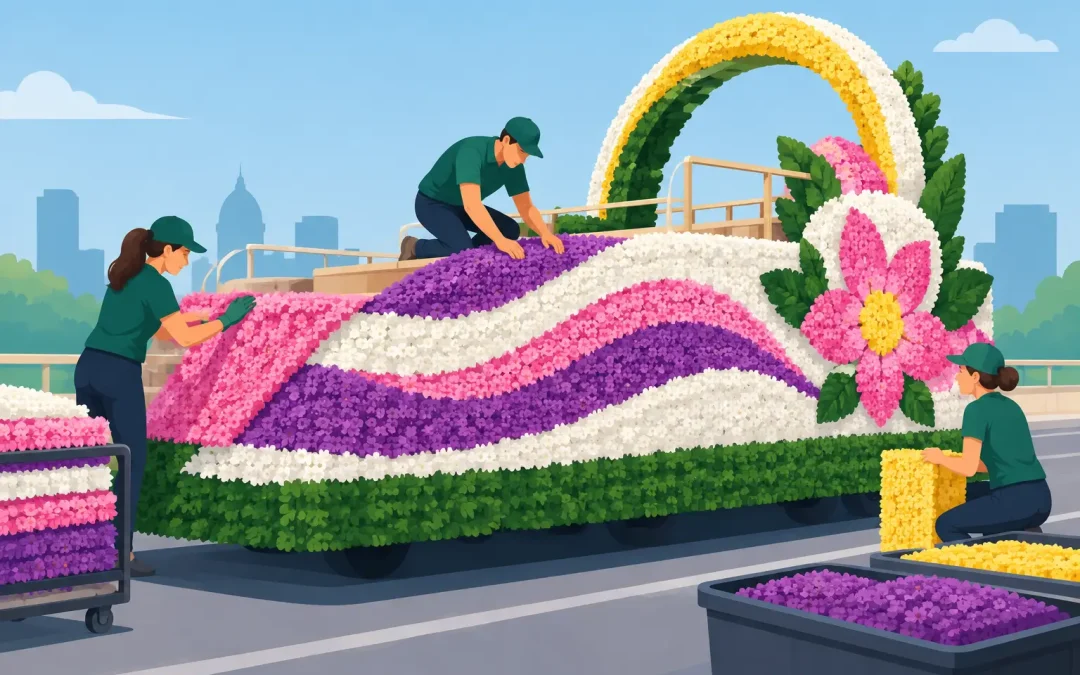
A float can have a great theme, bright colors, and a solid frame, then still look unfinished if the covering is loose, flat, or patched together. Learning how to arrange floral sheeting gives your float the full, textured color that makes it read clearly from the curb. The good news is that the process is straightforward when you plan your layout before opening the first roll.
Floral sheeting is one of the quickest ways to cover large float surfaces, hide construction materials, and create a uniform background for lettering, props, garland, and fringe. It is forgiving enough for first-time volunteers, but it also gives experienced float builders plenty of room to create stripes, borders, curves, and color-blocked designs.
Start With the Float Shape, Not the Roll
Before choosing colors or cutting material, look at the float as a group of separate surfaces. The sides, front, rear, wheel areas, railings, steps, and tall props may all need different treatments. A simple sketch does not need to be fancy. Mark each area, write down its approximate dimensions, and note where signs or large decorations will be placed.
Measure the height and length of every flat area you plan to cover. For curved or irregular sections, use a flexible tape measure or run a piece of string along the surface, then measure the string. Add extra material for overlaps, corners, and mistakes. A little extra is far better than discovering on decorating day that a visible panel is short by six inches.
Think about viewing distance, too. Parade spectators see most floats from several feet away, often while the float is moving. Broad color blocks and high-contrast combinations usually look stronger than tiny, detailed patterns. If your school colors are blue and gold, for example, a blue main body with a gold border and matching letters is easier to see than a dozen narrow stripes.
Prepare a Clean, Secure Base
Floral sheeting looks best when it is attached to a clean base. Cover rough plywood, exposed wire, or uneven chicken wire with a backing layer if needed. Plastic sheeting, paper, fabric, or foam board can help create a smoother surface, depending on the construction of your float.
Remove sharp edges, loose staples, and anything that could snag the material. If you are working over chicken wire, make sure the wire is firmly secured and tuck or cover cut ends. Floral sheeting can disguise a lot, but it cannot make a wobbly structure parade-ready.
Choose your fastening method based on the base underneath. Staples work well for wood and many foam-board applications. Zip ties can be useful around railings or wire frames. Floral wire, twist ties, and hot glue may help with lightweight accents, though glue alone is not the best choice for a large outdoor covering. Wind, vibration, and humidity can test every attachment point before the parade route even begins.
How to Arrange Floral Sheeting for Full Coverage
Begin at the bottom or back edge of the surface whenever possible, then work upward or forward. This allows the next section to overlap the one below it, much like shingles. The overlap helps hide seams and gives the finished surface a fuller appearance.
Keep the floral texture facing outward and avoid stretching the material too tightly. Pulling it flat can reduce the ruffled look that gives floral sheeting its color and dimension. Instead, hold it gently in place, secure one end, then work across the panel with light tension. The goal is coverage without sagging, not a perfectly smooth wall.
For a long side panel, attach the top edge first with a few temporary staples or ties. Step back and check whether the line is level before adding more fasteners. Once the panel is straight, secure it every few inches along the top, then fasten the lower edge and sides. On windy days, closer fastening points are worth the extra time.
When you reach the end of a roll, overlap the next section by several inches. Hide the seam beneath a fold, a border color, festoon, or a piece of fringe when possible. Do not place all your seams in one vertical line. Staggering them makes the coverage look more natural and prevents one area from becoming bulky.
Corners deserve special attention. Wrap the material around the corner instead of stopping exactly at the edge, then cover that wrapped edge with the adjoining panel. This gives you a cleaner finish than two pieces meeting edge to edge. For a rounded front or wheel well, make small relief cuts in the hidden edge of the material so it can bend without bunching. Cut carefully and avoid slicing into the visible ruffles.
Use Color Changes to Create Shape
Floral sheeting does more than cover the frame. It can define the design. A contrasting band near the bottom creates a visual base. A second color around windows, signs, or a central emblem can make those features stand out. On a patriotic float, red, white, and blue sections can be arranged in broad panels or angled sweeps. For a holiday float, a green background with red trim often provides a strong foundation for lettering and props.
Plan color transitions where they will look intentional. Natural break points include corners, railings, the bottom edge of a sign, or the start of a prop. If you need a diagonal stripe, lightly mark the path first with masking tape or chalk on the backing surface. Attach the main color, then layer the stripe color over it. Trying to cut two colors to meet perfectly edge to edge usually takes longer and shows more errors from the street.
A border is also a practical solution when your edges are not perfectly even. Fringe, garland, or a narrow strip of floral sheeting in a contrasting color can frame a panel and conceal small gaps. Save those finishing materials until after the main coverage is in place so you are not pulling them loose while adjusting the larger sections.
Build in Time for Lettering and Details
Do not cover the whole float and then wonder where the team name or sponsor message will go. Leave a clean, open field behind lettering so the words have contrast. White letters against pale yellow floral sheeting may disappear in daylight, while white against blue, red, or green is much easier to read.
Install large letters and signs after the sheeting is secure but before adding delicate trim. Press them into a flat, firmly attached area rather than a loose or heavily gathered section. If the float will travel at highway speed before the parade or sit outside overnight, reinforce signs with mechanical fasteners where appropriate.
Add pomps, festoon, glitter accents, and small props last. These details bring personality, but they should not be asked to hide major coverage problems. From a few steps away, look for thin spots, exposed staples, open seams, and edges that could catch the wind. From across the street, check whether your main message and colors still read clearly.
Avoid the Problems That Slow Down Decorating Day
The most common mistake is underestimating material. Measure early, order with enough room for overlap and trim, and keep a little extra in each major color. Matching a color at the last minute can be difficult, especially when several volunteers are working at once.
Another problem is putting too much responsibility on a single attachment method. A few staples may hold indoors, but a parade float faces wind, vibration, changing weather, and people brushing past it. Secure large panels consistently, reinforce stress points, and inspect the float after it has been moved.
Finally, assign one person to step back and check the overall design. Volunteers working close to the float may not notice that a stripe drifts upward, a seam is visible, or a sign is blocked by garland. A five-minute walk-around before cleanup can save a disappointing surprise on parade morning.
A well-arranged floral covering does not have to be complicated. Measure carefully, overlap each section, fasten it for the real conditions it will face, and use trim to make edges look intentional. If you are working toward a deadline and need help selecting quantities or coordinating colors, an experienced parade-supply team can help you get from a sketch to a float that is ready to roll.